Cooking Basics: How to Roast a Chicken
In the past every girl would have learned how to cook from her mother. Those lessons would have included basics like how to roast a chicken and a beef roast, how to bake a cake (from scratch), how to prepare various vegetables, and lots of other important kitchen skills. Now the cooking skills that many learn from their parents begin with a prefabricated food being removed from the freezer. They learn how to use the microwave and oven to heat up those foods but cooking from scratch is a bit of a lost art for many in America. Even people who “cook dinner every night” may be using canned cream of soups and frozen stir fry mixes with the sauce included. Many have no idea what to do with a whole chicken.
Are you are one of those people? Did you grow up learning the basics of cooking or did you grow up only putting frozen pizzas and the like into your oven on a regular basis? Does making a salad at your home mean opening up the bagged lettuce and pouring it into a bowl and topping it with dressing from the store? If you did not learn these skills at home this series of cooking basics posts are for you. If you know someone who is considering GAPS but the basic cooking skills required is tripping them up send them my way. Hopefully these posts will help.
Today we will be roasting a whole chicken.
The best thing about cooking a whole chicken is how economical it is. Whole chicken is nearly always cheaper per pound than any of the parts (except the backs and necks). And you get all of those parts together in one purchase. Once you have roasted a chicken you have the bones and drippings to make a tasty bone broth from so it does double duty. Plus it usually will mean left overs. You can then include the roasted meat in soup, topping salads or filling Oopsie bun sandwiches. Of course you can always just reheat it to eat at a later meal.
For this recipe you need
- 1 chicken
- 1 lemon (optional)
- 2 tbsp Celtic Sea Salt
 I find that fine ground works best for this.
- 1 tbsp herbs (optional)
Start by preheating the oven. The temperature you choose will depend on how long you have until dinner time. This comes out great if you start the chicken about 3 hours before dinner time at 300 (I love this sort of thing because I can put the chicken in during nap time and pull it out at dinner time.) But if you don’t remember till later it will take about 1.5 hours at 350.
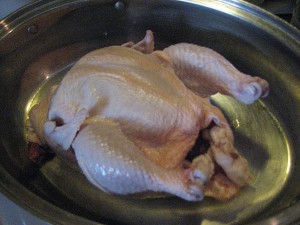
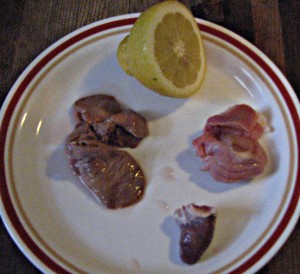
Here is a raw chicken and the organs I found inside of it (plus the optional lemon). I have washed the chicken and the organs with filtered water. Sometimes the neck will be removed from the bird and you will also find it inside of the cavity. Often the organs are inside of a plastic or paper bag inside of the bird. Don’t forget to check! Sometimes you won’t find anything. These organs are, in order of size from largest to smallest, liver, gizzard and heart. I grew up loving the heart and the gizzard. I think they taste similar but I like heart better. The gizzard has some gristle to it that makes it harder to eat. My mother always ate the liver. I am teaching myself to eat the liver now. I don’t love it but I do love how it makes me feel.
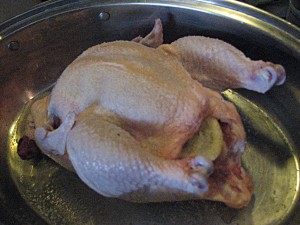
So once you have everything washed up what I like to do is put the organs back into the bird. If they cook inside of there they will be much moister than if you let them cook in the roasting pan. Then take the lemon (optional) and squeeze it all over the bird and then stuff the halves into the body cavity. Then take 2 tbsp of salt and rub it all over the outside of the bird. Don’t forget to get some into the cavity and on the organs. After this you can then rub in the tbsp of dried herb(s). Thyme, and sage are good low oxalate choices if you need to be careful of oxalates. Here it is all salted and ready to go.
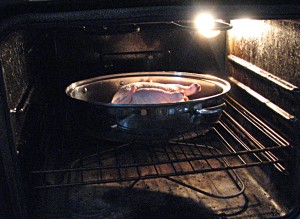
Put it into the middle of the preheated oven.
See above to know how long to set your timer for.
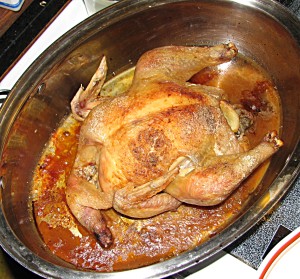
Here it is golden brown and finished cooking. See how the leg is falling away from the body of the bird? It is very tender. You can use a meat thermometer at this point to make sure it is hot enough. It should be 160 in the breast or 180 in the thigh. It is best if you put the cover on it for 15 min at this point. The temperature will rise about another 10 degrees and the juices will soak into the meat to keep it very juicy when you carve it.
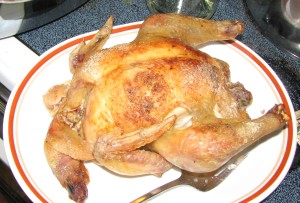
Here it is on the platter and ready to go to the table.
To cut it up you will need a good sharp carving knife. My husband got me this one for Christmas this year and I have been amazed at how much easier it is to use than my old knives (that I thought were good knives) You can click on it to read more about it. I’m sure there are even better knives out there but I almost don’t want to know about them because I am so happy with this one.
![]()
Don’t forget about the roasting pan. Remember all that brown stuff in the bottom of it? If you have a metal pan you can add a little bit of water and heat it on the stove top. Use a rubber spatula or a wooden spoon to “deglaze” (scrape it up) the brown bits. These have a lot of flavor. If your family likes gravy with your chicken you can add some broth and mashed cauliflower to thicken it and you will make a very good gravy (don’t forget to salt it) If you don’t like gravy (we don’t) you can add this liquid to bone broth. If you are ready to make bone broth (or already have some simmering on the back of your stove) just add this liquid or you can freeze the liquid till you are ready to make some broth. I often just dump it in with the bones that I also am storing in the freezer. If you have a glass pan you can’t heat it on the stove top or it may explode (ask me how I know). But you can boil water and add it to the pan to deglaze it that way. This step can be left till you have enjoyed your dinner.
After dinner is over collect all of your bones and any left over bits and put them into the freezer for future broth making. It works well to go ahead and remove all of the meat from the carcass and put it away before you have to try to find room for the whole thing it in the refrigerator. Then all of the bones can go into the freezer or a pot to start making bone broth.
Please do let me know what sorts of dishes and cooking techniques you want me to be sure to cover in this series in the comments.


8 Comments
Trackbacks/Pingbacks
- Linky Love : Retro Momma, Vintage Wife - [...] Cooking Basics: How to Roast a Chicken [...]









I am lucky that I did grow up being taught how to cook—I just don’t *like* to cook! lol. One thing I like to do with my roasted chickens is in the summertime, I use my electric roaster out on the deck to cook the bird. Why? So I don’t heat up the house =)
I also like to tuck fresh rosemary sprigs under the skin in the summer (when I have rosemary growing) and all winter I slice up onions and tuck them under the skin for added flavor.
Thanks Dorothy! Good ideas! I’m nervous of the squirrels getting into anything I try to cook outside. They aren’t shy and will come right onto our deck to pick the food growing there. Do you have lots of squirrels? Do they stay away? These city squirrels are tough!
I am lucky that not only do I know how to cook but I really do enjoy it. I used to bake cakes from scratch in the afternoon while my mother was in class (she went back to school to get her degree when I was in middle school). My family kept sweets to a minimum but I figured it was easier to ask forgiveness than permission (although I don’t recall being scolded for it). I just loved looking through her Betty Crocker cookbook and finding new recipes to try.
Patty- I roasted a chicken for dinner last night, and have been enjoying experimenting with different rubs! For last night’s version- after washing my bird, I brushed mustard onto the skin. Then sprinkled a mixture of parmesan cheese, shredded coconut, salt, pepper and parsley over it, which stuck to the mustard. I halved onions and put them in the cavity. It roasted beautifully and the skin got crisp and golden brown almost like fried chicken… and it had the greatest flavor!! No leftovers here, I’m afraid! They ate every last bite!
Amy- that sounds wonderful! With your crew it might take a big chicken to have many left overs (or a lousy recipe).
Patty,
I tried to comment on the tongue tie post, but for some reason it didn’t post my comment. Hope you don’t mind my commenting here since it’s your most recent post. Two questions:
1) Would you consider the MTHFRade a good electro drink for anyone who is GAPSy and particularly adrenal fatigue, regardless of MTHFR status?
2) Would I be thinking correctly to assume that an upper lip frenulum is also a midline defect? We have 7yo scheduled for an upper frenectomy this week, and that with the previous dx of epilepsy makes me go, “hmmm, maybe we should test for MTHFR?” Thoughts?
Thanks!
Wendy
1 yes
2 yes.
Testing would be a good idea. Remember it only tests for 2 mutations and there are 50 that are known and 7 that are common so even a negative test results doesn’t rule out MTHFR however there is a bit more research into those so know which one of those a person has (and if it is a single or double mutation) can help direct some of the treatments for it.
LOVE the pictures. Will experiment with your recipe, as I make chicken twice a week. Thanks!
I save the giblets to cook along with the carcass when making broth.
I learned a long time ago that if I crumble them into the broth, I don’t taste them at all. Being a big “chicken” about organ meats, this is how I “trick” myself into eating them!